Friday, May 22, 2015

Sketch Frenzy Friday, I Think You're Great!

Hi, everyone!
I received my new "SU! toys" in the mail!  
As in - from the new 2015-16 Annual Catalog!
The new In Color Cucumber Crush is a pretty bright green, not the fluorescent green I imagined.  The In Color lace ribbon trim is stretchy and beautiful.  And finally,  DSP  that has donuts in it!


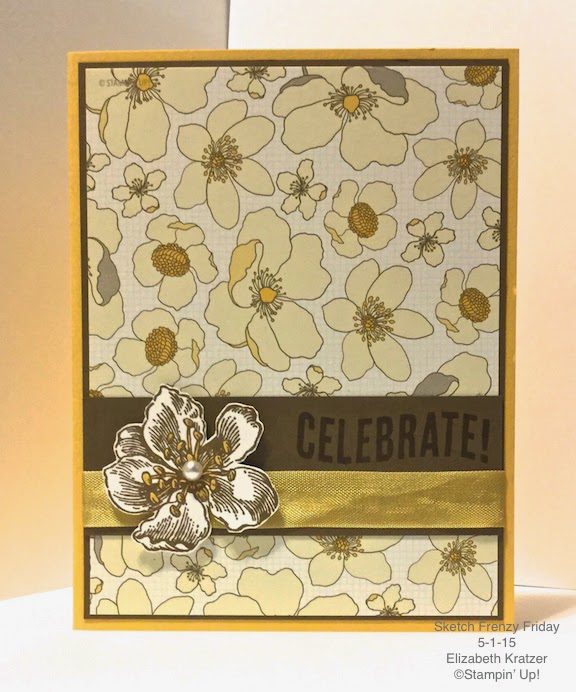
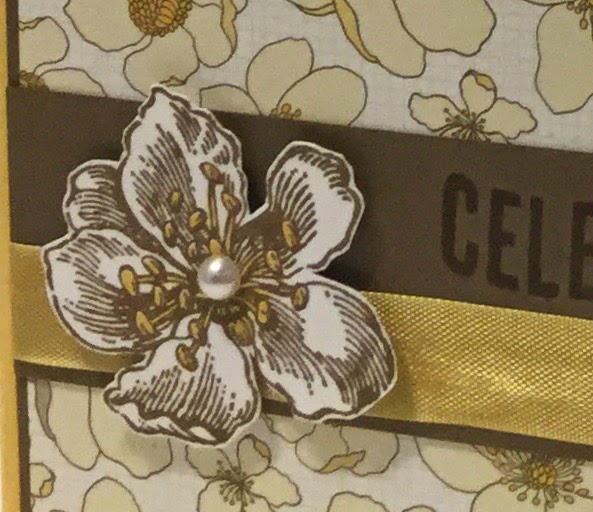
The I Think You're Great stamp set is one designed for the "kissing technique" -  solid background sentiments with two texture looking stamps to kiss with.  (I did no kissing on this card)

 Thanks, Diana, for this great sketch!  I can see myself using it over and over again!

Supplies

Stamps - I Think You're Great
Cardstock - Basic Black, Cucumber Crush, Whisper White;  Cherry on Top DSP stack
Ink - Memento Tuxedo Black
Accessories - Cucumber Crush 1" dotted lace trim;  3/4", 1-3/4", 2" circle punches;  7/8", 2-3/8" scallop circle punches, dimensionals, tombow glue (for the lace trim)

Play along with us at Sketch Frenzy Friday by using this sketch for your card, and adding it to the bottom of today's SFF post!

Have a blessed day!
Elizabeth K.

Tuesday, May 19, 2015

VC Rocks, Make and Take

"I Think You're Pretty Swell"
That statement and old cameras go together, reminding me of my childhood.


Supplies:

Stamps - Big On You
Ink -  Memento Tuxedo Black*
Cardstock - Whisper White. Basic Black, Flashback DSP
Accessories - 6-1/2" Daffodil Delight seam binding ribbon

* I had just reinked my ink pad and didn't want to wait for it to soak in well, so when I stamped my sentiment there were little white patchy spots on the thick black line.  I decided that this gave my card a more vintage look.  

  1.   Cut Whisper White cardstock to make the standard card of 5-1/2" x  4-1/4"
  2.   Cut Basic Black layer,  5-3/8" x 4-1/8";  using Stampin' Distress Tool, distress edges of layer.
  3.   Cut Flashback DSP layer to 5-1/4" x 4".
  4.   Stamp sentiment on blue layer of DSP; trim to 3-1/4" x 3-3/8", then carefully distress.  
  5.   Punch star out of blue layer and adhere scrap piece behind it;  adhere to 3-3/8" x 3-1/2" basic   black distressed layer.
  6.   Tie each end of the ribbon, maneuvering the knots to the right place;  trim ends, adhere.
  7.   Layer sentiment over part of the ribbon and  adhere with dimensionals.
  8.   Step it up by black embossing the sentiment.          

Friday, May 15, 2015

Sketch Frenzy Friday, Happy Graduation

Hi, everyone!  I'm glad you're visiting my blog!
Today's SFF sketch is from Elizabeth Harris:


Butterfly!  
For some reason butterflies make me happy, so I am excited about this card:

Another graduation card; this time it's for my cousin's daughter, Paige.
The sentiment looks weird but it is cut straight and adhered to the middle of the butterfly.
The more I looked at the butterfly the less I want to put items on my card.
I mean a Butterfly can stand alone as the only thing on a card, right?
So I made my sentiment as skinny as I could.

Supplies:
Stamps - Teeny Tiny Wishes
Ink - Mossy Meadow
Cardstock - Pear Pizzazz,  Adventure Bound DSP,   gold foil sheets,
gold fancy foil designer vellum
Accessories - Butterfly thinlets dies, dimensionals

Thanks for fluttering by my blog!
Elizabeth K.

Thursday, May 7, 2015

Sketch Frenzy Friday, Love You, Dude!

Hi everyone!  I made a masculine card for today.
Here's the sketch for this week:

 
I consider this masculine, even though it has sewing on it.

In this photo you can see the black embossing on the background better:


I used pieces from two different My Paper Pumpkin Kits, March 2015 and April 2015.
If you want to see more photos from these and other kits, search for "My Paper Pumpkin" on Pinterest!  Always great stuff on Pinterest!

Supplies:
Stamps - from April MPP Kit
Ink - Both MPP Kits, VersaMark
Cardstock - Pacific Point, Basic Black; DSP and other cardstock from both MPP Kits
Accessories - twine from both MPP Kits, 1" square punch for banners, black embossing powder, dimensionals

Now, I know you have leftover pieces from some project you did before.  
I challenge you to use them up with this sketch, and add it to the bottom of today's post at the SFF blog.

Have a wonderful day!
Elizabeth K.

Wednesday, May 6, 2015

VC Rocks! Make and Take


I made this Graduation card for my niece, Kellie.
I did have to redo my embossing on another piece of DSP.
You really can burn the paper with too much heat.  Lol!

Supplies:
Stamps - Adventure Awaits
Cardstock - Whisper White, Basic Black, Adventure Bound DSP
Ink - VersaMark
Accessories - White embossing powder, What's Up punch, dimensionals, Stampin' Trimmer, small scallop rotary cutting blade

1.  Cut Basic Black for the base of card, which is the standard 4-1/4" x 5-1/2".
2.  Emboss image using VersaMark Ink and White embossing powder.   
3. Then trim DSP to 4-1/8" x 5-3/8", using the Stampin' Trimmer with the small scallop rotary cutting blade.  You may choose to trim first, then emboss.  Since I am prone to errors in measurement, I trimmed after I embossed.
4. Punch White cardstock using Whats Up punch.  Trim down the length of the smaller arrow and adhere with dimensionals.

VC stands for Virtual Convention.  This year is our 15th year anniversary of joining together with fun and anticipation of the convention and release of the new Annual Catalog.  We have a yahoo group that anyone who loves Stampin' Up! products can be a part of, demonstrator or not.  You can still join if you are going to the Stampin' Up! Convention!  We have fun getting to know other stampers/scrapbookers through conversations, virtual stamp days, challenges, swaps, Make and Takes, like the one above, etc...  This is a high volume email group and new members are accepted only in the month of May.  So if you are interested go to our yahoo group and join in with us.  You will be sent a short survey to fill out and return, then you will be accepted.  Don't wait too late to join!


Have a blessed day!

Elizabeth Kratzer
VC Rocks Make and Take Coordinator

Friday, May 1, 2015

Sketch Frenzy Friday, Celebrate Everything Eleanor

This week's sketch is from Patrice:

Continuing on with my sunny celebrating, I chose Daffodil Delight again.
I love how the Everything Eleanor flower stamps match the Park Lane DSP.  
I am sure that Stampin' Up! had that in mind when they designed the DSP, but it took me nearly a year to figure it out.  I couldn't match a marker to the lighter yellow on the flowers, so I just left it alone and colored with the Daffodil marker on the inside. 

Supplies:
Stamps - Everything Eleanor, Celebrate Today
Cardstock - Daffodil Delight, Soft Suede, Whisper White, Park Lane DSP
Ink - Soft Suede;  Daffodil Delight marker
Accessories - Daffodil 1/2" seam binding ribbon, Jewels basic pearls, dimensionals

Please join us! Use this sketch and add your card to the bottom of today's post on   Sketch Frenzy Friday blog.

Today, I was able to view the Stampin' Up!'s 2015-1016 Annual Catalog, which will be out in June.  
I think my wish list is going to be a long one!
What to order first...
Elizabeth K.