Friday, August 22, 2014

VC Rocks Blog Hop

Hello, everyone!  I love these blog hops because there are so many talented ladies in the VC Rocks group.  For this hop we are "rocking our creativity" through colors!  I chose the two complimentary colors of blue and orange. Complimentary means they are straight across from each other on the color wheel. 


I chose Tangerine Tango and Island Indigo.  This card is a CASE, of course, and is a sketch I love to use when trying to use up my scraps. 

Supplies used are:
Starburst Sayings stamp set
Island Indigo and whisper white cardstock
Tangerine Tango ink
Designer papers (ret) from my scrap pile ( I did figure out the dimensions but forgot them & the card at home. I will post them on Mon)
Starburst framelits
White baker's twine
Retired brads

If you love Stampin' Up! products and would like to spend summer months  doing fun activities, join our VC Rocks yahoo group. We also have a blog that you can find great ideas and the rest of the blog hop entries:  vcrocks.blogspot.com 
Elizabeth Kratzer

Friday, May 30, 2014

Graduation Cards

 Here are my 2014 Graduation cards:


Inks used are Garden Green and Smoky Slate. The base of the card is Smoky Slate cardstock.  
I used the Basic Gray from retired Neutrals DSP and the Garden Green from the retiring Regals DSP.  The sentiment is from the retired Word Play stamp set.  I love to use this sentiment for grad cards.
Stars were punched from the previous silver glimmer paper.

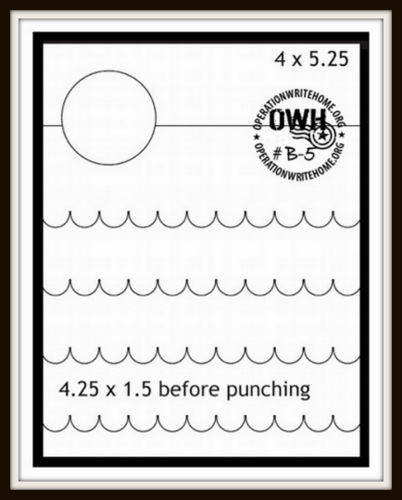
 I used the Operation Write Home Sketch 225 as inspiration.


Not being excited by the rounded corners on the card, for my next card I didn't round the corners.
I like this one much better.


On this card I used Whisper White, Rich Razzleberry, and Gold cardstock.  Patterned paper is from the retired Brights DSP pack.  The stars are punched from Champagne glimmer paper.

Tuesday, May 27, 2014

Rich Razzleberry Blendabilities

Hello! It's been more than a year since I posted, and 
today I want to share the Mother's Day card I made for my mom. 

The stamp I used is a new single one called Blended Bloom, and it's perfect for using Stampin' Up's Blendabilities.  I am so excited about the new alcohol markers because I have Copic Ciao Markers and feel very intimidated when I put the markers to paper.  But with SU's new Blendabilities Markers, I feel confident!  Blendabilities come 3 to a package - light, medium, dark - and you can purchase 12 different color packs.  The Skin Tone Assortment has 6 markers and there's also a Color Lifter.  What's great is that the markers are the SU! colors, so everything matches!

I used the Rich Razzleberry and Pumpkin Pie assortments to color the bloom.


If you are new to alcohol marker blending, I suggest you do what I did.  I found this card created by Kathryn Kunchik at Stampin' With Passion.  She does have a video on her site posted a couple of days later.  I enlarged the photo to see where she put the darker and medium colors.  Then I colored each petal like she did!  (Yes, I did; you can laugh if you want.)  Now that's really CASEing! 

I wanted to use the new yummy in color Blackberry Bliss, so I used the cardstock for matting and the strip on the button.  The happy mother's day sentiment is from Teeny Tiny Wishes stamp set.

If you are interested in purchasing anything from my website, go to Elizabeth's Stamp Room.
Have a great day!
EK

Friday, May 3, 2013

First Blog Hop of VC Rocks 2013

Hello and welcome to our first Blog Hop for VC Rocks 2013!  Yes, it's time to play.  
Check back at this blog for more links. 
Ok, folks, I am not a photographer and would rather stamp than learn how to shoot photos.
Some of my pictures have an added green splotch in the middle. 
 Don't know why, but I hope you can still see the cards well enough.


I used Print Poetry Designer Series Paper, Garden Green & Vanilla cardstock, along with the new in color Pistachio Pudding cardstock.  I love this Sizzlet's Pinwheel from the Spring Mini Catalog.   The sentiment is from a new stamp set Really Good Greetings.


This card is really beautiful, without that green splotch in the middle. 
So pretty with the contrasting colors Raspberry Ripple and Crumb Cake/Very Vanilla.  
Once again I used Print Poetry DSP, Sizzlets Pinwheel and Really Good Greetings.
These first two cards were CASEd from Mary Fish at Stampin' Pretty. 


Using this sketch from Operation Write Home,
I tried to showcase the new 2013-2015 In Colors.
OWH has an abundance of sketches, great tutorials & much inspiration!!


The actual colors are a shade or two lighter, more pastel-like in real life. 
The cardstock I used is Whisper White, Baked Brown Sugar, Coastal Cabana, Pistachio Pudding,
 Strawberry Slush & Crisp Cantaloupe.
I also used mini-brads, ribbon and a sentiment from A Round Array.


My last card is my favorite! 
 I CASEd this from some talented person, but there is no name on the photo.
I used the returning colors in our Color Refresh to make the pencils. 
(I missed you Soft Sky and Bermuda Bay!)
I think the sentiment from Really Good Greetings makes this a great end of the school year or graduate card.


It was so much fun to make, I had to hold myself back from adding other colors!

Since my Mojo is back, I have some extra 
Magic Mojo Sparkling Dust 
that I am spreading everywhere!!
So, Go! Create!!
Do it now!
Elizabeth Kratzer


(P.S. VC Rocks stands for Virtual Convention, which is where we who love Stampin' Up! meet together every summer to make friends, have some laughs and get lots of inspiration.  If you are interested in joining us, go to our yahoo group page http://groups.yahoo.com/group/vc_rocks/ )

Friday, August 17, 2012

VC Rocks Final Blog Hop

I hope you are enjoying the hop!
Can you believe it's the final blog hop already?  VC Rocks 2012 has gone by so fast.
You have come from Shari's Stamp Pad.  Although it's been years since I read Harry Potter, I enjoyed her HP characters!

The first creation I want to show you is actually an ATC.
ATC Kimono template is from Penny Wessenauer and I downloaded it from
 I used Simply Scored to score for the folding and cutting.

The belly band slips right off to open it.
Inside is supposed to be a tea bag, but I just made these tags instead.

 This is such a great idea for a gift card and it could be adjusted to make a full sized card.
Stamps used:  Bright Blossoms, Perfectly Preserved, Petite Pairs
Ink:  Rich Razzleberry, More Mustard & for sponging - Lucky Limeade, Island Indigo, Cajun Craze.
DSP:  Summer Smooches, Orchard Harvest
Cardstock:  Rich Razzleberry, Pumpkin Pie, Whisper White, More Mustard
Accessories:  Flower from punch pack, 1 1/4" scallop circle punch, 1 1/4" circle punch, 1 3/8" circle punch, pearl jewels, linen thread, Autumn Accents die, Pumpkin Pie ribbon, ticket corner punch (ret).

This next card reminds me of my dad because he had an old tractor under a tree for years. (Yes, I grew up in Louisiana.  Lol)  I really wanted to stamp a tree over the tractor and hubcaps leaning against the tires.  I may still do that!

And the inside...
Does anyone know why my cell phone made those darker stripes going across the picture?
Stamps:  Harvest Blessings, Lovely Little Labels
Ink:  Early Espresso, Always Artichoke, Baja Breeze, Soft Suede
Cardstock: Baja Breeze, Soft Suede, Naturals Ivory
DSP:  Subtles Color Stack,  Comfort Cafe'
Accessories: Metallic Brads, Artichoke denim ribbon (retired), Apothecary Accents Framelits, Bitty Banners Framelits (then I ended up trimming closer to the "barbed wire" frame)
This card will be going to a classmate's 15 yr. old son, who is getting treatments at St. Jude Children's Hospital.
Now, you are going to Robin's Craft Room.
I know you will love what she creates!
Have a blessed day,
Elizabeth K.


Tuesday, August 14, 2012

Mini-Scrapbooks

Several weeks ago I took an online class called Bind-it-All 101.
When making this guide, I learned different ways to punch and bind.
It was so much easier than trying to read the instructions & look at the pictures.
(Some of us need a little more instruction and repetition. Lol)

Then I made this cute "little" pocket book, meaning it was supposed to be around 4 or 6 pages, but I had to use each of the different papers/cardstocks that were in front of me to make tons of pockets.


I had to bind it first, then come back to decorate and make the tags.  Oh I loved making all those cute tags.


Cute, huh?
Ok, that's all the pocket pages I am going to show. 
 I have had a couple of fun things I've done this summer that will make their way into here.

My favorite is this Fall Fun scrapbook:


This is a fun page that opens up.
You can see on the left side how I messed up the fold on the first try.
It will be covered up with a cute picture of a kid, anyway.


Most of the patterned paper is SU! Orchard Harvest from the Holiday 2012 Catalog.


And that's the back cover.  
I love these apple pattern pages and the colorful stripes.
I am anxious to use them.  Is it fall yet?

Come back this weekend for our last VC Rocks Blog Hop.
Have a great day!
Elizabeth K.

Saturday, July 21, 2012

VC Rocks Non-card Blog Hop

Hello!  So glad you hopped over to me from Tania's Blog.  
If you want to start from the beginning, you can go to VC Rocks Blog.

The two items I want to share with you today are shaped keyring post it notes and monogram notes in a box.

These keyring post it notes are handy whether it is hanging on your purse or near your phone.
I used Stampin' Up's Perfect Plum, Concord Grape (ret) and cardstock vellum for these since the post it notes were purple.  I had them in several other colors, which I must have given away.
When using the Butterflies die, I cut out several pieces at a time.  For the notes I just pulled off enough from the post it stack to make the thickness of 3 or 4 pieces of cardstock.  At the back I added one cardstock butterfly.  Then I used my crop-a-dile to punch through the layers, adding the ring and finishing off with ribbon and rhinestones.  I adhered my cardstock butterflies to the front only in the middle to give my wings movement.

Here's a close up:


 And using my Fun Flowers die, here are my flower ones:


I decorated the front and the back with Tempting Turquoise cardstock, Summer Smooches DSP, brads and ribbons.  Notice that it is not necessary to use a ring;  just the ribbon looks great too!

This monogram note box is for my VC Roomie, Mary!  
(Don't look, Mary, if you want to be surprised)

The instructions to make this box are at Splitcoast Stampers.
Stamps used are Broadsheet Alphabet and Everything Eleanor.  Images are stamped in Primrose Petals onto just plain old copy paper cut down to size.
I also stamped on the outside of the box:

The piece of Primrose ribbon is adhered to the inside box bottom.  The button on top makes it easy to pull out a slip of paper when needed.

Just a preview of what is to come next week:
and

I finally learned how to (properly) use my Bind-it-all and made these great mini-scrapbooks.  I love embellishing them with Stampin' Up's Designer Series Papers and ribbons!
It's so much fun!

Speaking of fun, there is more at  Shirley's Blog.
Thanks for hopping!
Elizabeth Kratzer