Friday, December 19, 2014

Sketch Frenzy Friday, A Thousand Thanks

I hope you all are having a good Friday!  
Can you believe we are less than a week away from Christmas?!
      Well, today's card is not a Christmas one.  For this week's Sketch Frenzy Friday sketch, I made a thank you card using the All Is Calm DSP from the Holiday Catalog.

This week's SFF sketch is from Kim Innis.  
I love the repetition of the circles, reminds me of polka dots.  Thanks, Kim!

 Here's the card I made:
This gray background patterned paper is so beautiful!


Supplies:
Cardstock - Pear Pizzazz, Basic Gray, Whisper White, All Is Calm DSP
Stamps - Lots of Thanks
Ink - Basic Gray
Accessories - 1'',  1-1/4",  1-3/8",  1-3/4",  2" circle punches, 
1/8" silver ribbon, dimensionals

I hope you get some time to create a card using today's sketch.  Please share it with us by adding your link to the InLinkz at the bottom of today's post on the Sketch Frenzy Friday blog.  We would love to see what you come up with for this sketch!

Now hurry, go finish your Christmas shopping!
And have a very Merry Christmas!
Elizabeth K.

Saturday, December 13, 2014

From Our Home

VC Rocks is having its first ever Holiday Blog Hop!  I'm in!!
VC Rocks is a group of ladies who love Stampin' Up! products and join together (virtually) every summer to celebrate it.  I love the games, the chatting, the cardmaking, and scrapbooking  inspiration.  Follow the VC Rocks blog and in May you can join us.

The card I made today is a lot like yesterday's card.  See that post to get the DSP measurements on the sketch image.


Inside:

Supplies:
Stamps - Holiday Home, Good Greetings
Cardstock - Real Red, Garden Green, Whisper White, Soft Sky, Nordic Noel DSP
Ink - Garden Green, Real Red marker
Accessories - 1 3/8", 1 3/4" circle punches, 2 1/8" scallop circle punch

Go to the VC Rocks Blog and see what the other VCR ladies came up with.

Merry Christmas,
Elizabeth K.

Friday, December 12, 2014

Sketch Frenzy Friday, Merry Christmas

Hi, everyone!  I hope you are getting your Christmas shopping done.  
Since my mother-in-law died just before Christmas 2010, 
we've had a hard time getting into the Christmas spirit.  
This year I am finding I spend a lot more money when I am in the Christmas Spirit. Lol!

Today's SFF sketch is one I made.
I used My Digital Studio to make this sketch/card.
 Measurements for the paper panels are at the bottom of this image.
Funny story:  
I made a fabulous Christmas card using this sketch.  When it was time to post my card last night, I couldn't find the photo or the actual card itself.  I then realized I had mailed it to my godfather last week! 
So, I made another card for today.  It's not the same, but I think it might be close to the original card.
 The house and the Merry Christmas sentiment are embossed in Cherry Cobbler.

Here's the inside:
Supplies
 Cardstock:  Soft Sky, Real Red, Garden Green, Whisper White, Nordic Noel DSP
Ink:  Real Red, Garden Green, VersaMark
Stamps:  Holiday Home, Good Greetings
Accessories:  Cherry Cobbler embossing powder, 2" circle punch, 2 3/8" scallop circle punch

Since I was getting this second card done late, I will be adding my post using InLinkz at the bottom of today's post on the Sketch Frenzy Friday blog.
It would be great to see what you create using the sketch I made, 
so join us by adding your link also.
Happy Holiday Shopping!
Elizabeth K.

Thursday, December 4, 2014

Sketch Frenzy Friday, Gentle Peace

I had an awesome Thanksgiving weekend!  Our DD Mandy, who is handicapped, stayed well so it was great to be able to spend a few days with my family.
And I am looking forward to seeing them again in 3 weeks!

Our SFF sketch this week is one by Karen Gibson. 
Love it!  Thanks, Karen!

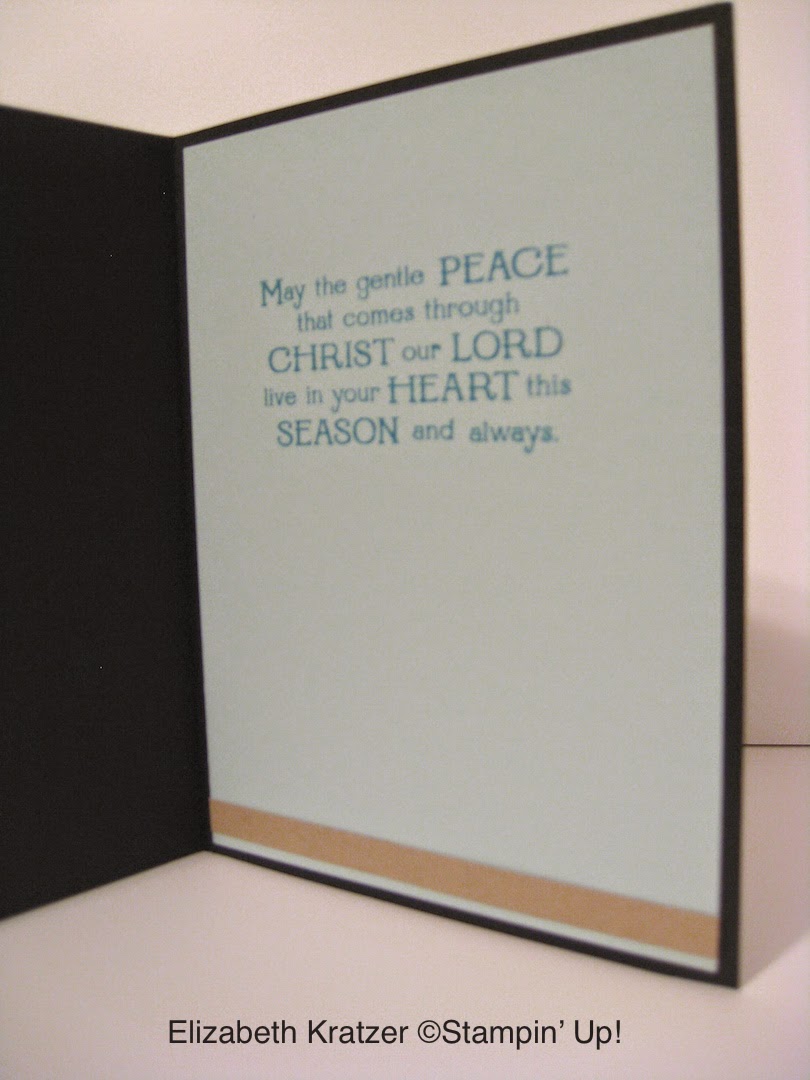
I chose Stampin' Up's Gentle Peace photopolymer set for this card also.


I love that this image can be used plain or colored. I cut a thin mat for the image using Lost Lagoon cardstock.  Karen's sketch called for embellishments towards the bottom of the card.  I chose to add strips from the two foil embossed sheets from the All Is Calm DSP in the Holiday Catalog.  If you zoom in on the picture, you will be able to see it better.

I love this sentiment!

Supplies:
Stamp Set - Gentle Peace
Cardstock - Smoky Slate, Lost Lagoon, Whisper White,
All Is Calm DSP
Ink - Lost Lagoon, Smoky Slate
Accessory - Silver 1/8" ribbon, uni-ball Signo Gel Pen

Join in with us using this week's sketch!  Just add your link using the InLinkz at the bottom of the post on today's Sketch Frenzy Friday..
Elizabeth K.


Thursday, November 27, 2014

Sketch Frenzy Friday, Peace

Hello, everyone!  I hope your Thanksgiving was a very happy one!  If you are still in the relaxing mode, sit back and enjoy what the SFF Design Team has created for you this week.
We used a sketch created by Carol Read.  I had so much fun with it.  Thanks, Carol!
Here's my card:
I love to make cards using flags.  This one had an array of flags that was different from any other I had made before, so it was a fun challenge.  Using only the cardstock (you know I love DSP!) makes the focal image stand out even more.  The image is embossed in black.  One thing I learned while coloring the image is to have a paper towel ready to dab each section after I color it.  Otherwise, the color stays on the top of the embossed area, and may be transferred to other areas.
 Here is the inside:
And here is another view:
Supplies:
Stamps - Gentle Peace
Cardstock - Basic Black, Soft Sky, Marina Mist, Real Red, Old Olive, and Crumb Cake
Ink - Crumb Cake, Marina Mist and VersaMark ink pads;  Marina Mist, Soft Sky, Real Red, Cherry Cobbler, Old Olive, Baked Brown Sugar, Daffodil Delight, Crushed Curry, Soft Suede, Early Espresso markers;  Ivory and Nude from Skin Tone Assortment Blendabilities
Accessories - black embossing powder, 2" & 2-1/2" punches, word window punch, pearls, dimensionals

I hope you have an enjoyable weekend!  Make it even more enjoyable by playing along with us at  Sketch Frenzy Friday.  Add your card using the InLinkz at the bottom of the post.  I would love to see your card there!

Elizabeth K. 
Giving thanks for the Cardmaking and Scrapbooking world!


Thursday, November 20, 2014

Sketch Frenzy Friday, Merry Christmas

I know it's Thanksgiving next week, but I have moved onto Christmas cards!
This week's sketch is from Stacey Tomkowiak.  I liked her sketch so much I followed it perfectly.  Thanks, Stacey!
This sketch reminded me that I haven't used my apothecary accents framelits in a long time.  I had envisioned the snowman in the White Christmas stamp set looking up at the birds and I got it to fit into the frame.  The mat I traced and handcut.
Although it was cloudy today, I still think you can see that I colored the 3 rhinestones at the bottom right red.  I did color over them three times, waiting until the previous coat dried.
I have to tell you after I worked with those stripes on the Nordic Noel DSP for a while, everything looked like it was crooked when I layered/glued them down.

Stamps - White Christmas
Cardstock - Real Red, Garden Green, Whisper White
Ink - Real Red and Garden Green markers and pads, Memento black
Accessories - Apothecary Accents framelits, Rhinestones, Cherry blendabilities, sponge

Check out the design team's creations at Sketch Frenzy Friday blog.  I would love to see your creations, so add yours using the InLinkz at the bottom of the post.
Elizabeth K.


Friday, November 14, 2014

Sketch Frenzy Friday, 11-14-14 Hello Butterflies

Thanks for checking out my blog this week!  Our Sketch Frenzy Friday challenge today is to use the
Triple Time Stamping, sometimes known as Triple Layer Stamping.   I found a tutorial at Splitcoaststampers.com .  Look under tutorials for Triple Stamping.
For my card I used the measurements from stampstodiefor.com  on Feb 20, 2014.


Supplies:
Stamps - Papillon Potpourri, Four You, Gorgeous Grunge
Cardstock - Very Vanilla, Lost Lagoon
Inks - Lost Lagoon, Hello Honey, Cajun Craze
Accessories - white baker's twine, glue dots, temporary adhesive (I used scotch temporary double sided tape.)

Instructions:
1.  Cut Vanilla cardstock to - 5 ¼" x 4", 4 ¼" x 3", 3 ¼" x 2"
2.  Cut Lagoon cardstock to - 4 ½" x 3 ¼", 3 ½" x 2 ¼",  5 ½" x 11" - folded in half for base.
3.  Using the temporary adhesive, layer the vanilla cardstock pieces, centering each as you go.
4.  Stamp the sentiment first, then stamp your images randomly.  Start with the biggest image, ending with the smallest image.  Your images will look somewhat messed up around the areas where the card layers meet, but don't worry.  These will be covered by the mats.
5.  Using the Gorgeous Grunge sprinkled dots image, pick up the Lagoon ink, stamp off twice on scrap paper before stamping onto layers.
6.  Peel off the vanilla layers.  Mat with the Lost Lagoon card stock.  Before adhering top panels to card, wrap the baker's twine around the layer.  Make bow separately.  Use glue dots to adhere to panel.

There you have it!  It actually is a very quick card.  Try this technique yourself and add it to the Inklinz at the bottom of the SFF post for today.
 Elizabeth K.

Friday, November 7, 2014

Sketch Frenzy Friday, 11-7-14 Happy Everything!

Hello & Happy Friday!  I don't know about you, but I am so ready for the weekend!
First, let's take a look at this week's sketch from Sketch Frenzy Friday.


Our fearless leader, Kim Innis made this sketch using Stampin' Up's My Digital Studio program.  Thanks Kim!

I needed a card for my father-in-law, so I included many holidays on this one.  He is so thoughtful as to send birthday cards all year long to everyone he knows.  Since he retired I have been sending him books of postage stamps several times a year.  He claims it's the best gift.  Dad is also fond of drinks so I used the Making Spirits Bright stamp set from the 2014 Holiday Catalog.


I used my Blendabilities markers to color the images.   The candy cane drink is popped up with dimensionals.  I made a few mistakes when coloring the eyeball drink, so I colored it on a scrap piece of paper, cut it out and adhered it over the image on the card.  (By the way, all my cards look better in real life, so I have enlisted my amateur photographer DD Danielle to help me set up a "photo booth.")


Supplies:
Stamps - Making Spirits Bright, A Dozen Thoughts, Holiday Home
Cardstock - Mossy Meadow, Whisper White, Basic Black, Red Glimmer
Inks - Memento Tuxedo Black, Real Red, Pumpkin Pie, Mossy Meadow
Blendabilities - Cherry Cobbler, Old Olive, Daffodil Delight
Accessories - 1 3/8" and 1 3/4" circle punches, dimensionals
Measurements for the white and red glimmer panels - 3 1/8" x 4 1/4" and the black mats - 3 1/4" x 4 3/8".

Take a look at the other team members' cards at Sketch Frenzy Friday blog.  Please join us by adding  your creation using the InLinkz at the bottom of the post.

Happy Everything!
Elizabeth K


Friday, October 31, 2014

Sketch Frenzy Friday, 10-31-14 Thanks

Hello, everyone!  Thanks for visiting my blog!  Here's the sketch for today:


Patrice Herrera used Stampin' Up's digital program to create this card sketch.  My Digital Studio is great for cardmaking & scrapbooking.   I use it often to create flyers for my husband's fundraisers.


My card is made from the Hip Hip Hooray card kit.  What I added to it is the green base, vanilla &  brown sugar layers.  Everything else is from the kit.  I love all the pieces you can put together to create cards.  I used one of the example cards, pictured in the kit, as a starting point.


I cut the polka dot front off of the note card, trimmed & layered it to make a full card.  The Baked Brown Sugar cardstock is layered on the Pistachio Pudding cardstock.  The Pistachio cardstock measures 5" x 3 3/4" & the other layers were cut approximately 1/8" smaller. Approximately = I just don't like to figure out the measurements using the 16ths of an inch marks.


Supplies:
Hip Hip Hooray Card Kit, which includes the stamp set & Basic Gray Stampin' Spot
Cardstock - Very Vanilla, Pistachio Pudding, Baked Brown Sugar

On the Sketch Frenzy Friday blog you will find the design team's cards.  Play along with us using the InLinkz button at the bottom of the post!

Have a Happy Halloween,
Elizabeth K.


Friday, October 24, 2014

Sketch Frenzy Friday, 10-24-14 Kindness

Hello and TGIF!  Or should I say TGISFF - Thank God its Sketch Frenzy Friday!  Lol!  This awesome fall weather has me feeling very happy, and thinking I am funny!
Oh, well, here's something fun - our SFF sketch.  Thanks, Elizabeth Harris for the sketch!


I cussed my computer at first for not downloading the whole sketch.  You may LOL!
Here's the card I made using Elizabeth's sketch:


I was excited about using my Kinda Eclectic stamp set for the first time!  The sun & leaf are my favorite stamps in that set.  But I do love butterflies that have punches to go with them.


Supplies:
Stamps - Kinda Eclectic, Four You
Ink - Daffodil Delight, Night of Navy, Pear Pizzazz
Cardstock - Whisper White (3 7/8" x 2 5/8"), Soft Sky (5 3/4"x 4 1/4"),  Night of Navy (for base & mat - 2 3/4" x 4")
Accessories - Elegant Butterfly & Bitty Butterfly punches, white baker's twine, glue dots, 2013-15 In Color sequin assortment, dimensionals.

Play along with us on the Sketch Frenzy Friday blog.
Have a great weekend!
Elizabeth K.

Thursday, October 16, 2014

Sketch Frenzy Friday, Calm Snowflakes

Hi and happy Friday!  Our sketch for Sketch Frenzy Friday is from the talented Terri Tank.  Thanks, Terri for the great sketch!


For my card, I played with sequins and snowflakes.  Even if we hardly ever get snow in southeast Texas, I still love the wintry feeling of this card.


No matter what I tried, the Soft Sky DSP still looks a little greenish to me on my computer.   I even edited the picture with my iPhoto program. The Soft Sky & Lost Lagoon colors look accurate on my cell phone though.  Oh, well...


Supplies:
Stamps - Endless Wishes
Ink - Lost Lagoon
Cardstock - Lost Lagoon, Soft Sky and All Is Calm Designer Series Paper
Accessories - In Color sequin assortment, Frosted Sequins, All Is Calm snowflake, Silver 1/8" ribbon, glue dots, Tombow glue, Rhinestones, Pearls, Light Blendabilities marker from the Night of Navy set, used to color a pearl.

I hope our cards will give you some inspiration for your own cards.  Play along with us at Sketch Frenzy Friday by adding your card using InLinkz at the bottom of today's post.

Have a great weekend!
Elizabeth K.

Puppy Card

Hi!  Thanks for coming to my blog.  I hope you enjoy the card I made this week.  I used a non-SU! image to color and I colored the dog with Copics.  But SU! Blendabilities would work great with this too!!


I braided three strands of Baker's Twine - Early Espresso, Cherry Cobbler & Bermuda Bay.  It took a while because the twine was on the thinner side.  I will never braid twine again, unless it is thicker!

SU! Supplies:
Stamp for sentiment - A Dozen Thoughts
Cardstock - Real Red, Whisper White, Soft Sky, (ret.) Storytime DSP
Ink - Real Red
Accessories -   Alphabet Press embossing folder, scalloped tag topper punch, Early Espresso, Cherry Cobbler & Bermuda Bay baker's twine

The design of the card is from one of the instructors of Online Copic Cardmaker's Class.
Copics:  E43, 44, 47; R00, 02,22; Y02, 15; 0-blending pen.
SU! Blendabilities I would use in place of these are Cherry Cobbler, Daffodil Delight & Crumb Cake sets, Color Lifter marker.

Don't Worry, Be Happy - tomorrow is Friday!
Elizabeth                                                                                         

Thursday, October 9, 2014

Sketch Frenzy Friday 10-10-14, In My Thoughts

Hi everyone!  Welcome to another Sketch Frenzy Friday!
Today's wonderful sketch is from Diana Eichfeld. I like the way she put the designer paper in the sketch.  It gave me a starting point for the whole card.  Thanks, Diana, for the great sketch!


I actually ended up with 2 cards because I wasn't sure about which designer paper I liked best.  


Stampin' Up! has many great colors to choose from, so I usually end up using my favorite colors.  I haven't used the Night of Navy in a long time. So seeing the designs on the Flowerpot DSP, I went for Navy.  The print on the first card I made was big and I wondered if it should have been smaller. so  I tried the smaller print flowers on the Garden Green background.  (Another color I have neglected for a while.)


I decided I liked both of them!  
For my image I inked up the top half of the stamp with the Garden Green ink pad and colored the trunk with Soft Suede marker.   I brayered color over the top and bottom, leaving just enough room for my sentiment in the middle.  I should have centered the trunk between two of the words, but this time I just traced over it with the Lost Lagoon marker.  After a few tries of brayering, I realized that I needed to start with lighter colors & then sponge Garden Green and Night of Navy on the edges.

Here's the inside:


Supplies:
Stamps - Thoughts & Prayers, A Dozen Thoughts
Ink - Lost Lagoon, Night of Navy, Garden Green, Pistachio Pudding, Soft Sky & Pool Party
Cardstock - Night of Navy for the base,  
Whisper White cut 1 at 5 3/8" x 4 1/8", cut 2 at 3" x 3 1/4"
Garden Green cut to 4 3/8" x 4"
Designer Series Paper - Flowerpot cut at 4 1/4"x 1 5/8" and    4 1/4" x 2 1/4", scrap  piece to punch out shape for the bottom, 
Accessories - Decorative label punch,  Regals candy dots, candy dots brads, Lost Lagoon ribbon

I would love to see what you come up with using this sketch.  Join us by adding a link to your post at the bottom of the Sketch Frenzy Friday post.

Have a blessed day!
Elizabeth K.


Thursday, October 2, 2014

Sketch Frenzy Friday, 10-3-14, Sympathy Rose

Hi Y'all!  TGIF!  And on Friday I get to show you another sketch from Sketch Frenzy Friday!  This week's sketch is from  Kathy Clark!  I hope you like it and will join us!


Here's the Sympathy card I made with it.

I have been practicing with my SU! Blendabilities, and this focal point was large enough for me to use the Sweetbriar Rose stamp. 


Supplies 
Sweetbriar Rose & Bloom With Hope stamps 
Whisper White - cut to 3 3/4" x 2 3/8",
Real Red - base, & 2 mats:  3 7/8" x 2 3/4" and 4 7/8" x 1 3/4"
Flashback Designer Series Paper - red - cut to 5 1/4" x 4"
Park Lane DSP - green - cut to 4 3/4" x 1 3/8"
Brights Candy Dots, dimensionals
Blendabilities Markers - Old Olive, Crumb Cake & Cherry Cobbler sets;  Color Lifter

Of course, the Color Lifter is vital!  Because I make mistakes, and i do it often.  I also used the Lifter for lightening up the center of the roses.

I colored the roses on a scrap piece of Whisper White, so I could cut them out & not have to worry about coloring out of the lines.  I challenged myself to use all three of the Old Olive markers on the leaves, but only used two Crumb Cake markers for the stems.

Won't you join us this week, by adding your post using the InLinkz at the bottom of the Sketch Frenzy Friday post?  I would love to see what cards you come up with!

Happy weekend!
Elizabeth K.


Thank You card with Envelope Punch Board Bow

I had no idea you could make bows and banners using the Envelope Punch Board!
Well, here they are!


The supplies and instructions for my card are at the VC Rocks Blog.
Elizabeth Kratzer

My Blended Ballerina

Stampin' Up's new alcohol markers are called Blendabilities! They blend very well!
The Ballerina digi image below is by Kristen Werner,  but all the coloring was done with SU! Blendabilities.
Using the Skin Tone Assortment and blending the colors several times really makes for a smooth face.  I used the Ivory for the base color, then darkened a few areas with Nude, then back to Ivory to blend out the line where the two met.  I also used the Blush marker to make the two circles on her cheeks. That was also blended around the outside with the Ivory.  Her lips, dress and shoes were colored with the Calypso Coral trio.

The Night of Navy Light marker was used for her eyes and the shadow.  I thought the shadow was too bright, so I added the Smoky Slate Light to darken it a little.  Well, you know I did go a little crazy with the shadow and had to "erase" the blue/slate that wanted to meet in the middle!  I am so impressed with the Color Lifter!  It was easy to erase the color, then after it dried, I grabbed my Ivory marker to recolor that area of the face.  I bet you can't even see that mistake!  (I had not allowed the Color Lifter on my other mistakes to dry before taking this photo;  those out-of the-lines color on the top of her hair and her left side top of the skirt definitely look better when dry.)

Daffodil Delight markers were used for her hair, but as you can tell my Daffodil Dark marker had no ink in it.  When I get another I will add those dark areas to the hair.

If you use the Blendabilities, let me know what you think of them in a comment below.  Have you compared them to Copic markers?  What do you think?

Elizabeth K.

Friday, September 26, 2014

Sketch Frenzy Friday, Vases Thanks

Hello, everyone!  I am now officially a member of the Sketch Frenzy Friday team!  Yay!  I look forward to creating cards from the wonderful sketches presented - like the one for today's SFF.  Thanks, Marisol Gutierrez, for the great sketch!

I immediately went to my Vivid Vases stamp set.  Using the Another Thank You photopolymer set, I did curve the sentiment as much as I could.


I stamped Vivid Vases on two different Designer Series Paper sets.  Cutting out the vases took a little bit of time, but I believe it was worth it. 
I then used my Blendabilities for the flowers and leaves.  First off, I suggest you stamp the flowers on scrap pieces of paper to practice until you are satisfied with the look before coloring on the main image.

A few notes about coloring with Blendabilities:
***When coloring small images, use only two of the marker set. It's difficult to get all three in.  I used light & dark markers, coloring it several times to get the better blended look.
***To color the navy flower, dot with the dark color and then fill in with the light color.
***I used only the light from the Old Olive Blendabilities for the leaves.  I hope that Stampin' Up! comes up with a lighter green marker set.
***For the first flower, I did "tip to tip" coloring.  First I colored in the whole flower with the Blush marker from the Skin Tone Assortment.  Then using the Blush marker, I picked up a little color from the Melon Mambo light marker.  Starting at the bottom of the flower, I flicked the color up until it blended with the Blush color.  I did this several times until I was satisfied with the look.

Close up


Inside


Supplies:
Stamps - Vivid Vases, Another Thank You, Blooming with Kindness (inside sentiment)
Ink - Memento Tuxedo Black, Lost Lagoon
Blendabilities Sets - Night of Navy, Coastal Cabana, Melon Mambo, Daffodil Delight, Old Olive, Skin Tone Assortment
Cardstock - Crushed Curry, Lost Lagoon, Whisper White
Designer Series Paper - Flowerpot, Lullaby
Accessories - Lost Lagoon ribbon, banner punch, Oval framelits, Jewels Basic Pearls 

How about you taking on the challenge to make a card from this week's Sketch Frenzy Friday? 
If you need to see more ways on how to use this sketch, check out the rest of the design team's cards at Sketch Frenzy Friday Blog.  You can also add a link at the bottom to your post about your card.
Have a blessed day,
Elizabeth K.

Tuesday, September 9, 2014

Sketch Frenzy Friday 9/5/14 Wishing You Happiness

Hello, everyone!  I hope your day is a good one!
I have enjoyed seeing all the cards created by friends using the sketch from the Sketch Frenzy Friday blog.  So I am hoping to be invited to be on the design team! 
What I like about the sketches is that it's not just one person's ideas, but everyone on the design team gets a few turns to put up their own sketches.  So there's lots of variety.  Seeing the cards the team comes up with is inspiring because of the variety on the one sketch that is posted every Friday.

The past Sketch Frenzy Friday's sketch was created by Patrice Herrera.  (Thanks, virtual roomie!)  It's basically for a clean & simple card, but my card probably doesn't fall into that category!


 Here's my card based on the sketch:


I am not sure if you can see all the shininess, because it's a cloudy day for my picture taking.  I used Stampin' Up's Brushed Silver Cardstock, Silver Foil Sheets, Silver Fancy Foil Designer Vellum and 1/8" Silver Ribbon.  These items really made the wedding card look elegant!

And the inside:

 A couple of things to note about this card:  I used the circle vellum instead of the hearts because it's easier to tape down behind the bigger circles.  The cross was embossed with white embossing powder, very carefully sponged with Smoky Slate ink, then ink was wiped off of the embossed image.
Here's a close up of the cross:

I believe my customer will be very satisfied with this card!
I'm adding a link of this post to the Sketch Frenzy Friday page using the InLinkz at the bottom of the post.  Won't you join me?  Challenge yourself to make a Clean & Simple card based on the sketch or see how many embellishments you can add to the sketch!

All Stampin' Up! Supplies:
Stamps - Blessed By God
Cardstock - Whisper White, Brushed Silver, Silver Foil Sheets & Silver Fancy Foil Designer Vellum
Ink - Smoky Slate, VersaMark
Accessories - 1/8" Silver Ribbon, 1/2" and 3/4" circle punches, White Stampin' Emboss Powder, Stampin' dimensionals & glue dots

Have a blessed day!
Elizabeth K.

Friday, August 22, 2014

VC Rocks Blog Hop

Hello, everyone!  I love these blog hops because there are so many talented ladies in the VC Rocks group.  For this hop we are "rocking our creativity" through colors!  I chose the two complimentary colors of blue and orange. Complimentary means they are straight across from each other on the color wheel. 


I chose Tangerine Tango and Island Indigo.  This card is a CASE, of course, and is a sketch I love to use when trying to use up my scraps. 

Supplies used are:
Starburst Sayings stamp set
Island Indigo and whisper white cardstock
Tangerine Tango ink
Designer papers (ret) from my scrap pile ( I did figure out the dimensions but forgot them & the card at home. I will post them on Mon)
Starburst framelits
White baker's twine
Retired brads

If you love Stampin' Up! products and would like to spend summer months  doing fun activities, join our VC Rocks yahoo group. We also have a blog that you can find great ideas and the rest of the blog hop entries:  vcrocks.blogspot.com 
Elizabeth Kratzer